Managing Sales
Managing sales is a basic function every Point of Sale application must have, including Pinodesk. The sales feature on Pinodesk can be accessed via the Transaction > Sales menu. On this page, you will see a table containing the sales data that you have saved. The sales data on this page shows the revenue rate for your store.
Adding Sales
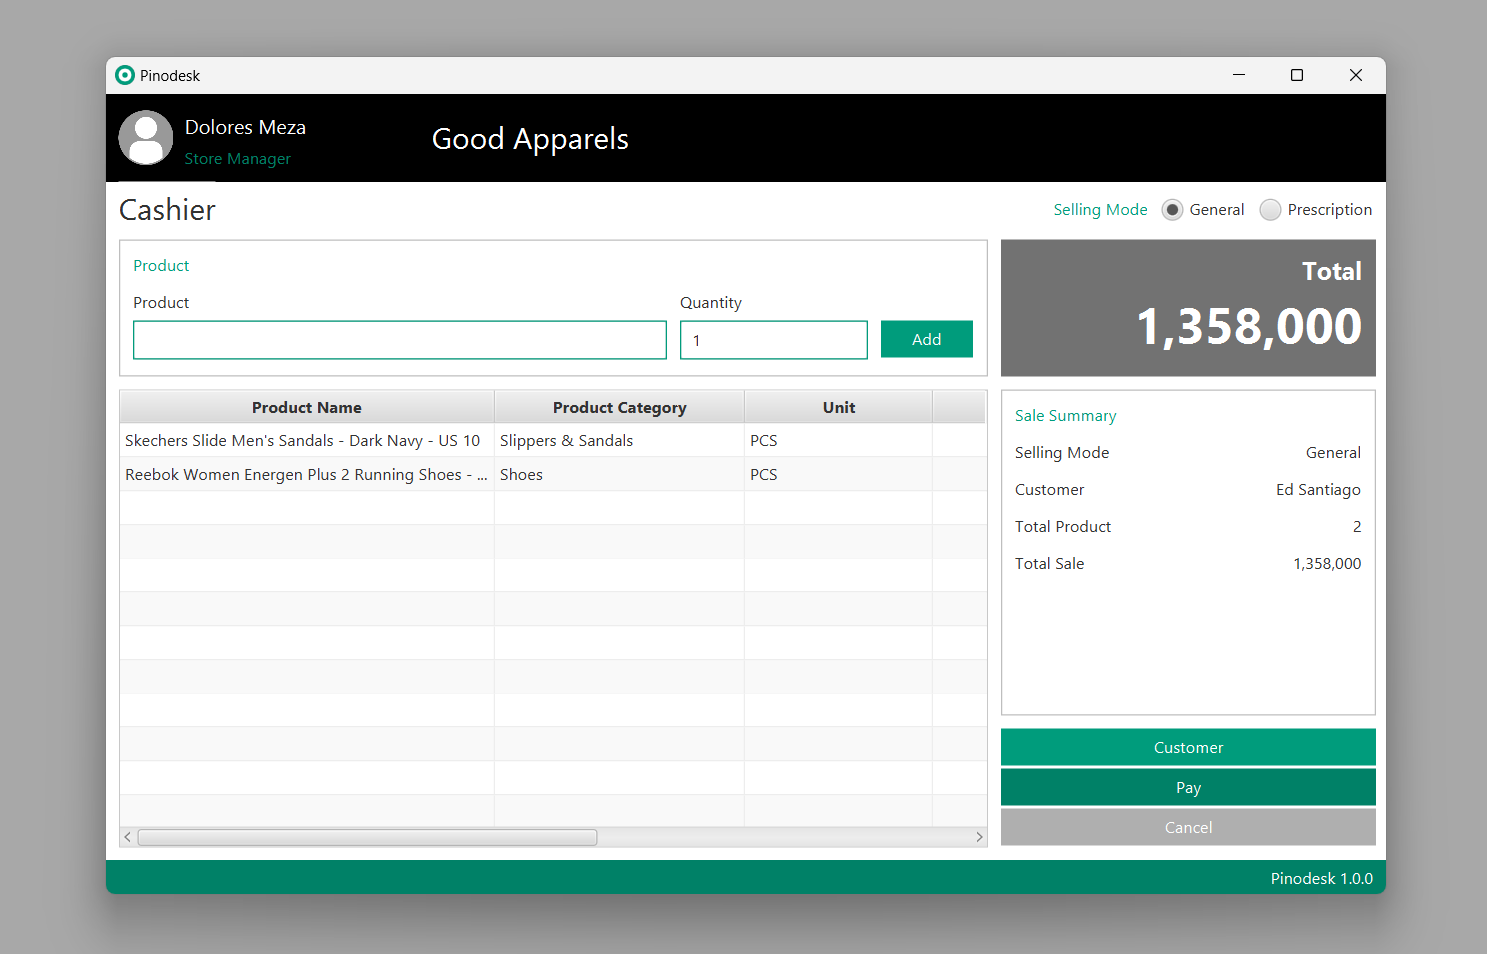
Adding sales can be done via the Add Sale or Cashier forms. The Cashier Form is optimized to be used in conjunction with a barcode scanner and the way cashiers work in general, which displays information on total customer purchases, payments, and change, as well as printer functions to print shopping receipts. To record sales data without additional features such as the Cashier form, you can use the Add Sale form.
Cashier Form
You can open the Cashier form from the Cashier button on the Sales page. The cashier form has a simple appearance that focuses on the product list and total sales.

You can start adding products by placing the cursor in the Product field and pressing the ENTER key to search for the product. The following are some steps to add sale products in the Cashier form:
- Fill in the Product field with the product name, product code, or barcode to immediately search for the right product then press ENTER.
- Select the product on the Select Product form.
- Fill in the Quantity field with the number of product sales and press ENTER or the Add button. The product with sales quantity will be inserted into the table.
- Choose a customer if necessary via the Customer button.
- Press the Pay button to enter customer payment data.
- Press the Save button to save sales and customer payment data.
There are several things you need to understand when adding sales products to the Cashier form:
- The Product Confirmation form will appear when the product you selected does not yet have a selling price (when adding a product, you can leave the Selling Price field empty) or if there is an expired date to select (not mandatory). You can fill in the Selling Price field and select Expired Date on the Product Confirmation form then press the Confirm button to add the product to the table.
- When searching for a product using a unique and precise product code or barcode, the product will go directly to the table if no data needs to be confirmed as in the conditions above.
- Adding a product that is the same as an existing product in the table will automatically increase the number of sales of that product by one.
Add Sale Form

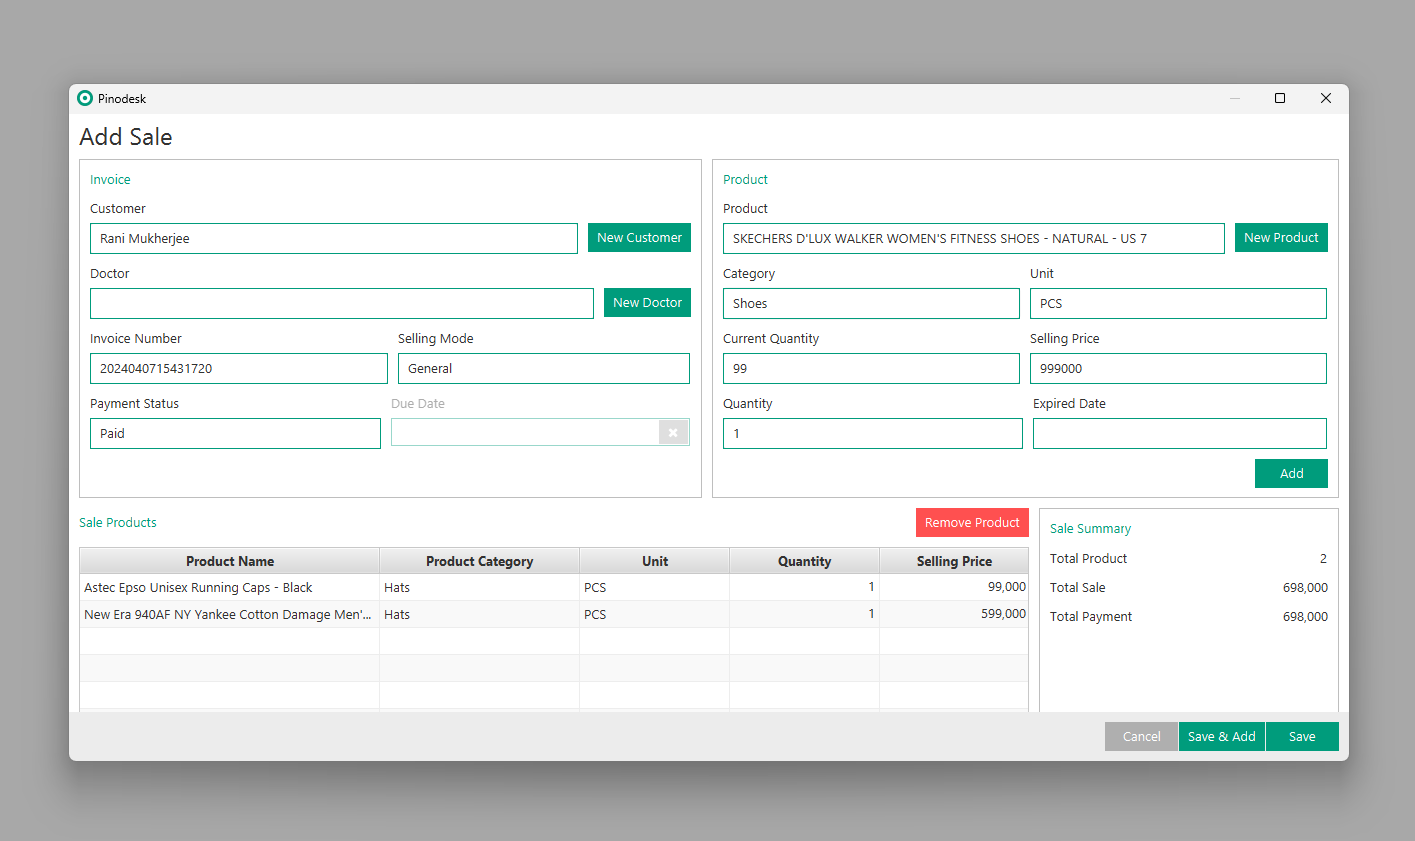
Adding sales via the Add Sale form is similar to the Cashier form, only different in appearance. There are two sections that you need to complete in the Add Sale form:
Invoice section. This section contains customer information, invoice number, selling mode, and payment status. The payment status Unpaid will be your customer’s payable to your store. You can manage the account receivables via the Transaction > Receivables menu. Complete the information in the Invoice section and continue adding products via the Product section.
Product section. This section is used to add products that have been sold to the Sale Products table. Enter the products sold one by one via the Product field. Select the product that you have previously added. If the product you are looking for is not found, you can press the New Product button to add a new product and save it, then select it via the Product field again.
Fill in the Selling Price and Quantity fields for the product being selected according to the sales of that product. Select the available Expired Date if necessary.
After entering all sales data, press the Save button to save the sales data, or Save & Add to immediately add other sales data without closing the current Add Sale form. The quantity of product stock will automatically decrease after you save sales data.